Find your way around Program Settings
A guided map of Settings: which tab holds what, from your program's name and branding to reporting numbers, feature switches, and your account.
Settings is where you shape your program: what it's called, how it looks, and the lists and numbers the rest of TRIOPilot runs on. Open Settings from the admin sidebar. The tabs across the top group everything by purpose: Program, Reporting, Features, Emails, Participants, Team, Program Year, Account, and Audit Log.
This article tours each tab. If you know what you want to change but not where it lives, skim the headings.
There is no single Save button. Every card saves on its own button, so finish one card before moving to the next. Checkboxes and switches save the moment you tick them.
Program: Name, Color, Logo, and Terms
Who your program is. Everything on this tab shows up in the interface itself.
- Program Identity holds your Program Name, shown in the portal header and throughout the app. Choose Save Program Name. The page reloads so the new name appears everywhere.
- Program Logo is optional and appears in the sidebar of the advisor and admin portals. PNG, SVG, JPEG, or WebP, under 2 MB, and a transparent background looks best. Use Upload Logo, then Replace Logo or Remove Logo later.
- Color Scheme themes the whole advisor and admin interface, not just the buttons: the sidebar, headings, the page background, borders, badges, and the primary buttons all follow it. Start with a preset: each tile is a complete, designed composition (a brand color, a page tone, and a sidebar style) rather than a bare hue, so every one of them looks finished. If none is quite yours, open Customize and set your own brand color (type a hex value or use the picker), choose a page tone (cool, neutral, or warm), and choose a sidebar style (dark, brand-colored, or light). TRIOPilot derives every shade from those choices, keeps text readable on buttons and in the sidebar, and shows a note beside any pairing that falls short. The live preview renders real portal pieces (the sidebar, a stat card, a primary button, a table row, a badge) in the candidate theme as you adjust it, so you see the result before anything is saved. Choose Apply Color Scheme to keep it, or Reset to Indigo to return to the default. Ordinary body text stays dark gray in every scheme, because copy is easier to read when it is not tinted. Your public application form and homepage are not affected.
- Terminology renames Student, Contact, Advisor, and Event, singular and plural, across your portal. If your program says "participants" instead of "students", type it here. Leave a box blank to keep the default, then choose Save Terminology.
Reporting: What Your APR Reads
Grant constants and federal definitions. These are the numbers your Annual Performance Report is built from, which is why they sit together rather than beside your logo.
- APR Report Configuration holds your grant numbers under Grant Numbers by Program Year: your Number Funded to Serve, per-objective targets, and for EOC the postsecondary enrollment option, each saved for the program year you pick, so past years keep reporting against their own targets. The card also holds whatever else your program type needs, such as state assessment cut scores. See Run your APR.
- Project Information holds your PR/Award number, address, project director, and project period. It populates Section I when you run your APR, so complete it before you file.
- Low-Income Eligibility Thresholds take your program's annual income limit for each household size, from 1 to 8 people, plus an amount for Each additional person. Choose Save Thresholds. These limits drive the Income Eligibility Calculator question on your application form: it asks household size first, then offers two ranges built from that size's limit ("Under $32,460" and "$32,460 or more"), and the applicant's answer sets low-income eligibility automatically, which feeds your APR.
- Annual Enrollment Goal is your internal target for reportable participants in a program year, which runs September 1 to August 31. The Annual Enrollment Progress card on the admin dashboard measures against it. It is separate from Number Funded to Serve, the grant figure on the APR Report Configuration card.
Fill in your thresholds before you share your application link. With none saved, the income question cannot offer any ranges, applicants see "Income thresholds have not been configured by your program yet", and staff have to set low-income status by hand on each profile.
Features: What Your Program Can Do
Every on and off switch in TRIOPilot, in one place.
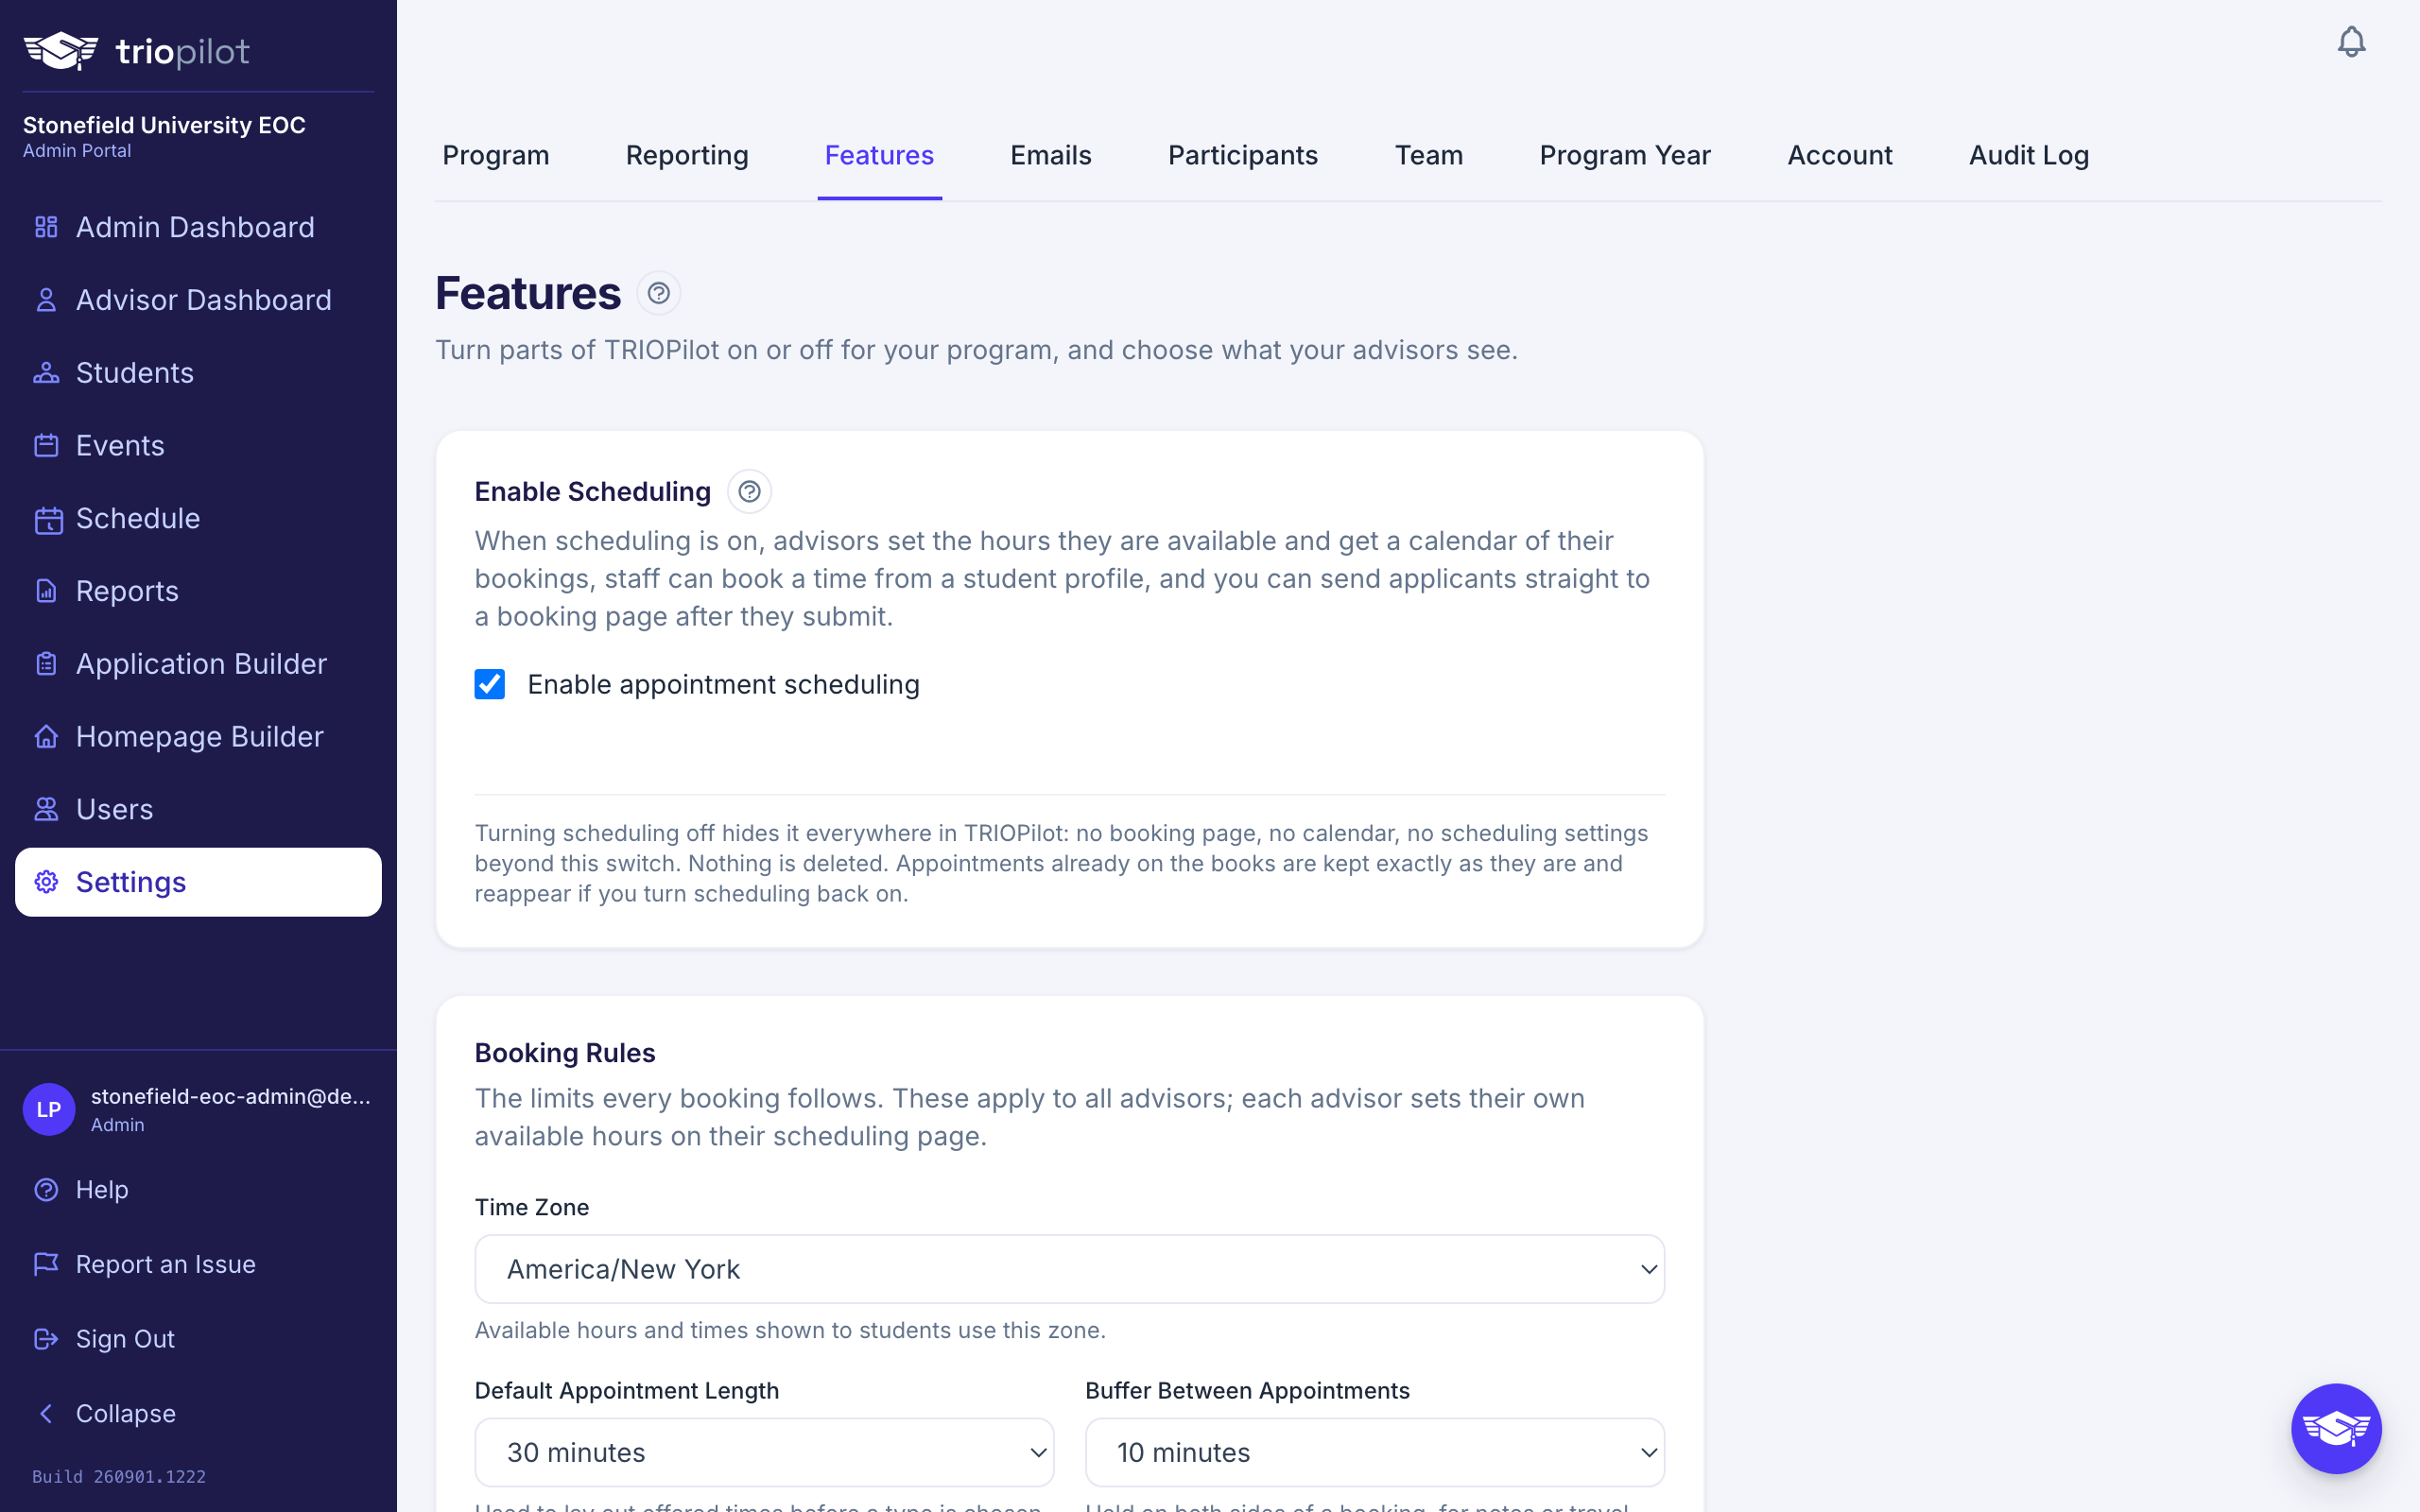
- Scheduling starts with Enable Scheduling. Turn it on and three more cards appear: Booking Rules (how far ahead a student may book, the notice required, the buffer between appointments), Appointment Types (the named kinds of appointment you offer, each with a length and the modalities it allows), and Days Off (days the whole program is closed, with US federal holidays filled in automatically; nobody can book on a closed day). Turn it off and those cards go away along with every booking surface, so you are never left tidying scheduling furniture. Nothing is deleted: appointments already booked are kept exactly as they are and reappear if you switch scheduling back on. See Set up appointment scheduling.
- Student Portal is off unless you turn it on. When enabled, participants who already have a profile can create an account, verified by their email address and date of birth, to view their own record, add comments, and upload documents. Everything else stays read-only. The portal includes an activity stream showing contacts, staff comments marked visible to the student, record updates, appointments, and the application submission, each with the staff member's name on it; you choose which kinds appear using the Portal column on the Activity Feed Display card below. Turn the portal on and the Log Contact form warns your advisors that participants can read their notes.
- Text Messaging holds the Enable SMS texting checkbox. With it on, advisors get a two-way text conversation on student profiles and this card shows your usage for the month. See Send a text message.
- AI Assistant is off unless you turn it on. When enabled, staff get a chat panel that looks up students, builds filtered lists, and drafts contact logs; only a staff member can save a draft. The card explains how the AI provider handles the data and, while the assistant is on, shows this month's usage against your program's request limit. See Use the AI assistant.
- Activity Feed Display chooses which kinds of entry appear in activity feeds: Contacts, Profile Edits, Comments, and Enrollment. A fifth, Appointments, is listed only while scheduling is on, and appears the moment you tick the switch above. With the Student Portal on, each row carries two switches: Staff controls the feed on a profile, and Portal controls what a participant sees in their own portal activity stream. Two things ignore the Portal column on purpose: a participant's own comments always appear in their stream, and appointments and program years keep their own portal sections either way. Everything is shown by default. This changes what the feeds print and nothing else: every entry is still recorded, and the audit log is untouched.
Emails: The Wording of Automatic Emails
TRIOPilot sends a few emails on its own, such as the receipt an applicant gets after submitting and the confirmations around appointments. This tab is where you edit their wording, with your program's details merged in, or leave the ready-made defaults. You write in English and the Spanish and Haitian Creole versions are generated for you. See Edit the emails TRIOPilot sends.
Participants: How a Record Is Shaped
Four decisions an admin usually makes together, on one tab.
- Profile Fields defines the custom fields on a profile and turns catalog fields on or off. See Customize student profiles.
- Profile Layout arranges those fields into cards. Same article.
- Contact Types and Modalities holds two lists: types (the kind of help, such as FAFSA guidance) and modalities (how it happened, such as in person or by phone). Both appear on the Log a contact and Record an event forms. Each logged contact records exactly one type, so selecting several types saves one contact per type.
- High School List holds the schools offered by the High School Attended question, one per line. Choose Save High School List. Applicants pick from your list or choose Other (not listed) and type their own, and the same list suggests matches when staff edit a profile.
If either contact list is empty, advisors see "No contact types are set up yet" or "No modalities are set up yet" and cannot finish logging a contact. New programs enter their types during onboarding, so if logging seems blocked, check this tab first and add at least one type and one modality.
Team
What each role in your program may do. See Add a user or advisor. Adding and removing people stays on the Users page: this tab is about what a role can do, not who holds it.
Program Year
Rollover: moving your continuing participants into the next cycle, plus a no-stakes rehearsal and the defaults a run follows. See Roll students into a new program year.
Account: Your Data and Your Subscription
- Data Export gives you Export All Students (CSV): one row per participant with a record in the current program year, with identity, demographics, eligibility, status at entry, outcomes, and assigned advisor. For a different year, or for the APR-specific export, use the exports on the APR report.
- Billing appears only if your program subscribes through Stripe. It shows your subscription status, and Manage Billing opens the secure Stripe portal to update your payment method and view invoices.
Looking for your apply link or the Application QR Code? Neither is in Settings. Both sit at the top of the Application Builder, beside the form they point at. See Build your application form.
Audit Log
Opens the full audit log outside Settings: see See who changed what.