Find and filter students
Search the student list, answer questions like "who still needs a FAFSA?", customize your columns, and act on a whole group at once.
The Students page is the workhorse of TRIOPilot: your students in one list, with search, filters, your own choice of columns, and bulk actions. If you used our old Report Builder, this page replaced it; everything it did lives here now.
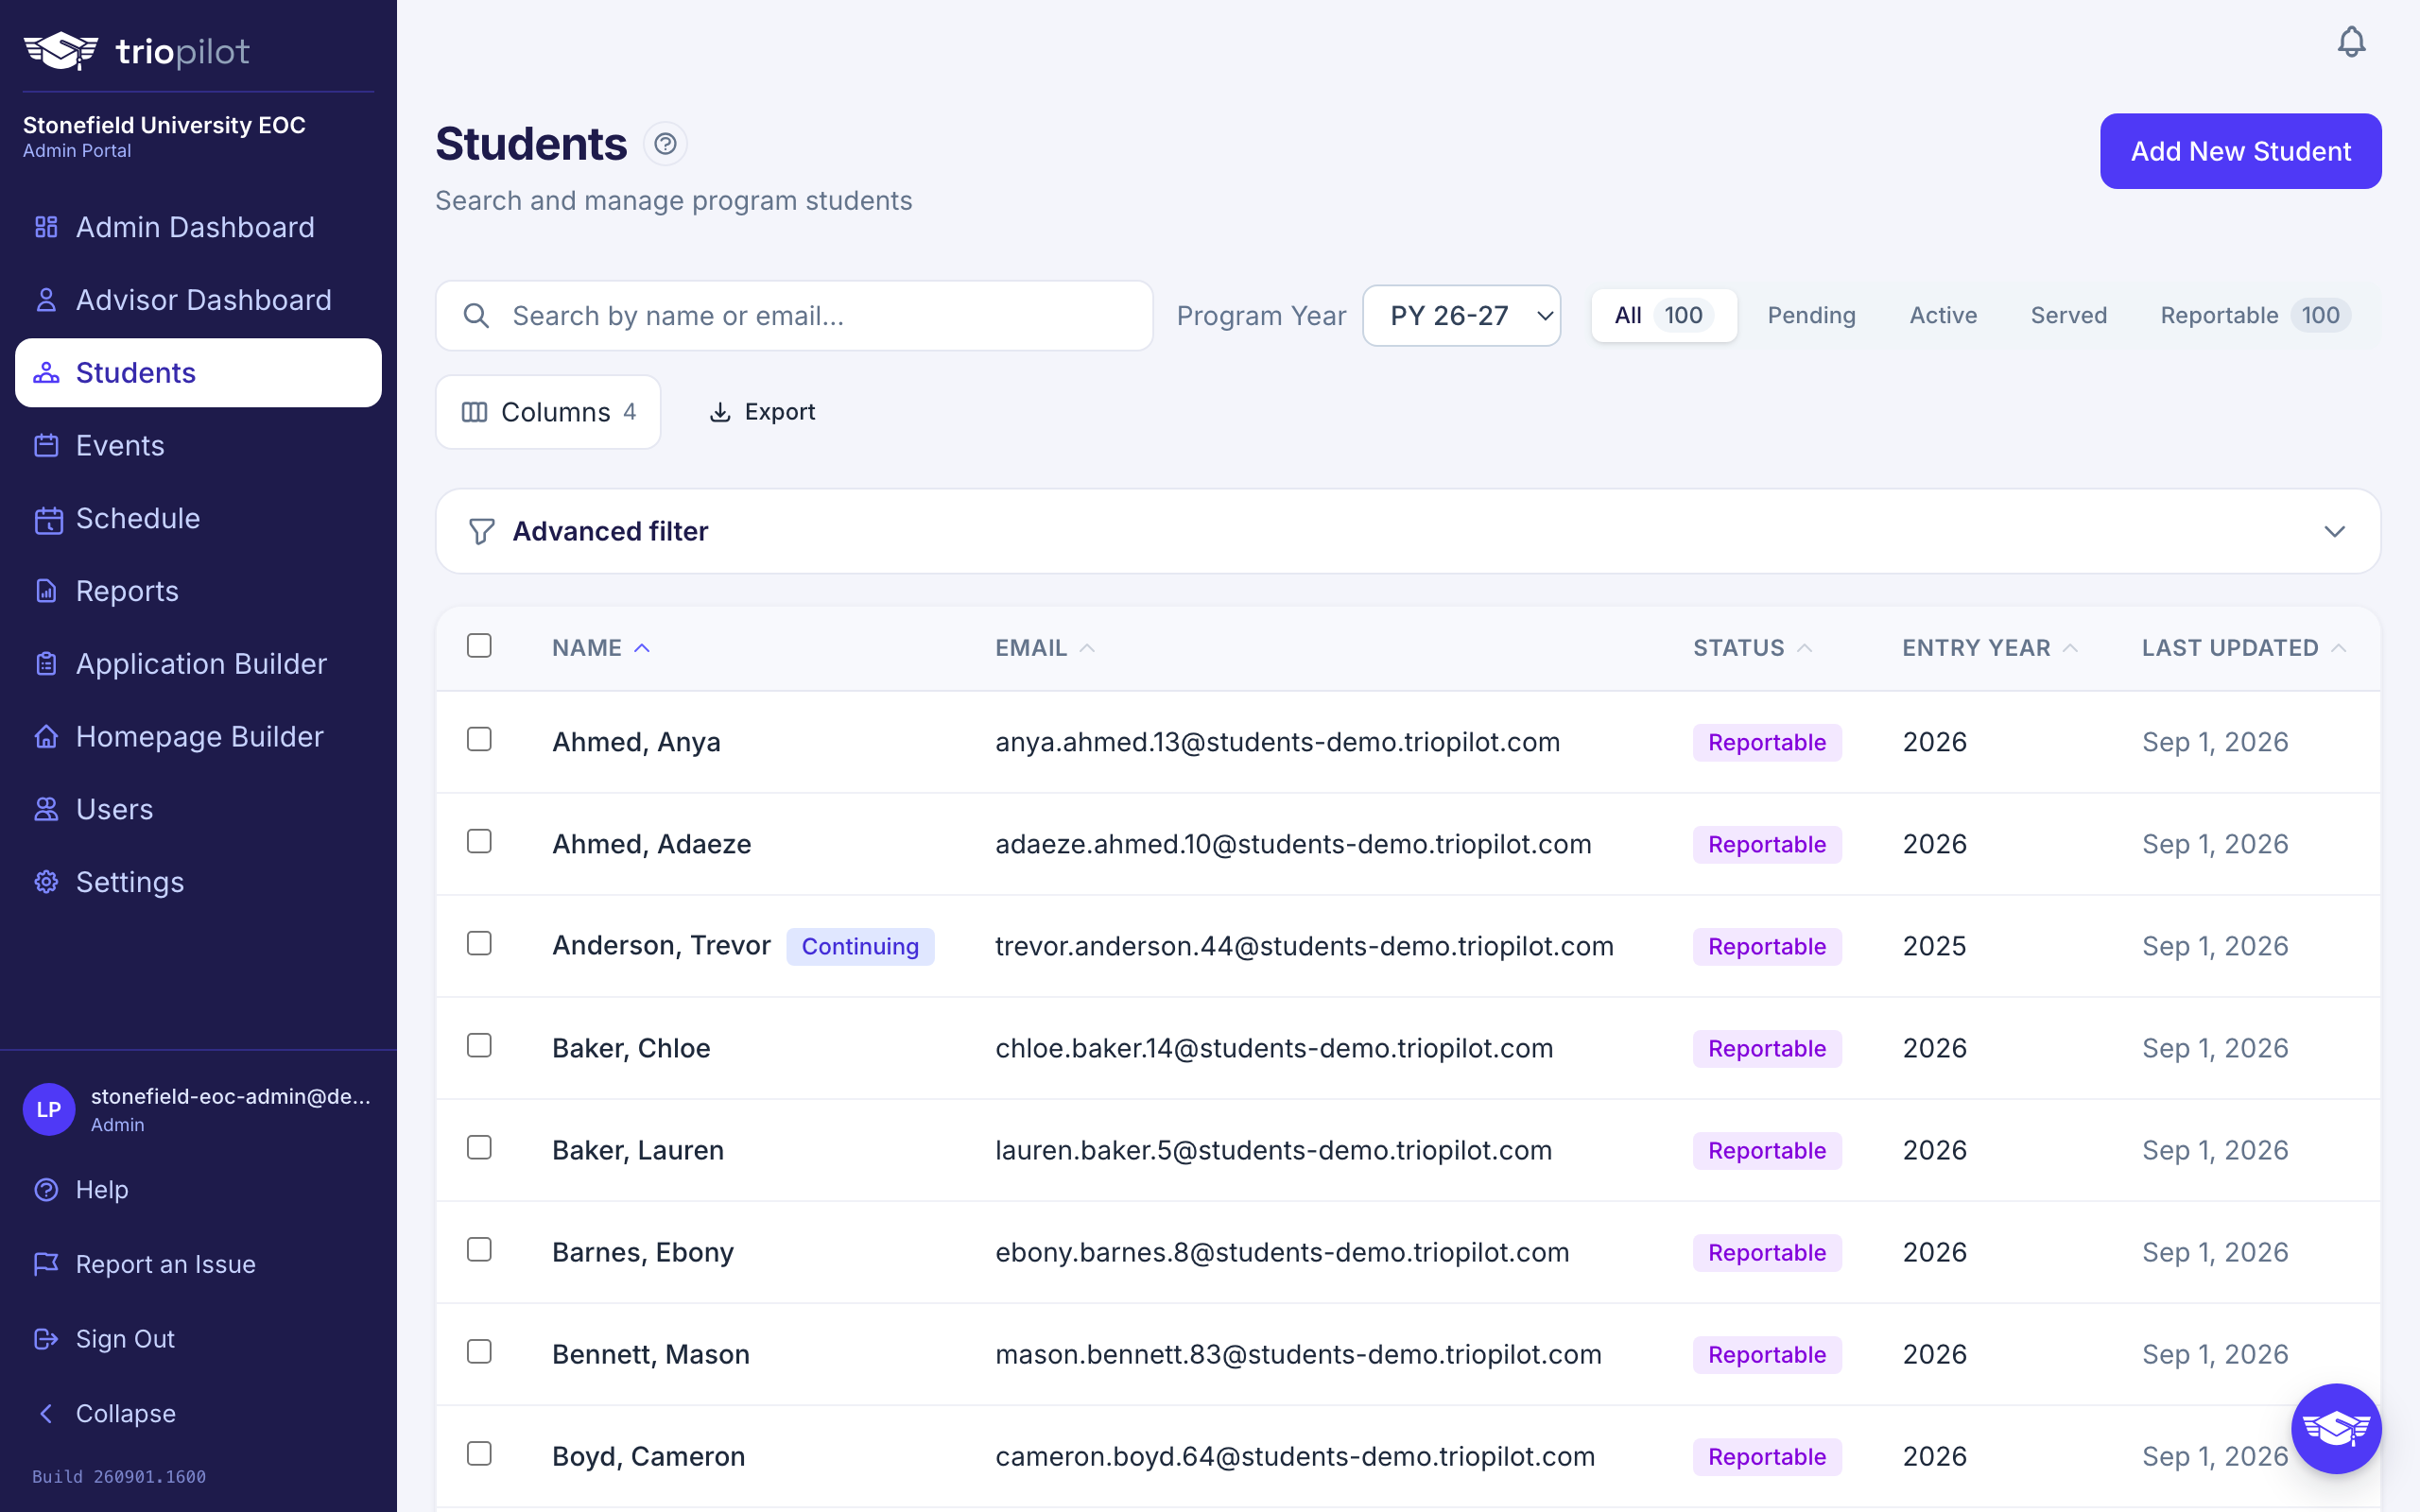
The list shows one program year at a time and opens on the current one. The Program Year picker sits right beside the search box. It lists every year your program has data for, plus All Years, so the roster of any past year is one pick away, and a student who was not carried forward into the current year by rollover is still on the roster of every year they were enrolled in. If your role can add students, an Add New Student button sits in the page header; see Add a student by hand.
To bring a single former student into the current program year, open their profile and use the ... menu next to Log Contact, then choose Add to the current year. That enrolls them as a continuing participant so they show up on the current year's roster. To move a whole group forward at once, use rollover instead.
Long rosters are shown 50 rows at a time. When more than 50 students match, a pager appears below the table with Prev and Next buttons and a count like "Showing 1-50 of 300 · Page 1 of 6". Search, filters, and sorting always work across the whole roster, not just the rows on screen, and changing any of them brings you back to the first page.
Search and Quick Filters
- Search box. Type any part of a name or email; it also matches phone numbers, high schools, and tags. It filters the program year you are viewing. What you typed stays in the box when you switch the Program Year picker, so you can walk one name across the years without retyping it. The small x at the right edge of the box clears it.
- Status tabs. All, Pending, Active, Served, and Reportable, each with a count of that year's students. New applications wait in Pending, and an amber banner at the top of the page flags them; click the banner to jump straight to that tab. See Understand student statuses.
- Program Year picker. Next to the search box. Pick any earlier year to see everyone who has a record in that year, or All Years to search your whole history at once (more below). If your search finds nobody in the year you are viewing, the empty list offers a Search all years link that carries your term straight to All Years.
Find Anyone with All Years
When you do not know, or do not care, which year someone belongs to, switch the Program Year picker to All Years. The page becomes a find-a-person view of your entire history: type two or more letters of a name, email, or phone number and the matching students appear, whatever year they were enrolled in, with each name linking to the profile. The table shows each student's latest status, advisor, last contact, and the program years they have a record in, 50 at a time with the same Prev and Next pager.
All Years is for finding and browsing only. The status tabs, Advanced filter, column picker, bulk actions, and Export belong to a single program year, so switch the picker back to a specific year to use them.
Ask Harder Questions with the Advanced Filter
Who still needs a FAFSA? Which active students have no diploma recorded? The Advanced filter answers questions like these, against the program year you are viewing.
- Choose Advanced filter to expand the panel, then Add Condition.
- Pick a field, an operator (Equals, Does Not Equal, Contains, Is Empty, and so on), and a value. Results update as you go; there is no button to press.
- Add a second condition and a Match ALL / Match ANY toggle appears. ALL means every condition must be true, ANY means at least one. Clear all removes the conditions when you are done.
For the FAFSA question: add FAFSA Completed, Does Not Equal, Yes, then Status, Equals, Active, and keep Match ALL.
The field list goes well beyond what the table shows. It includes profile fields like Immigration Status, your program's custom fields, and its APR fields, whose names end in "(APR)".
When you first open the panel you may briefly see Loading all fields while the rest of each student's record arrives; it is usually too quick to notice. If that load ever fails, a message appears with a Retry button, and search and the status tabs keep working in the meantime.
Make the Table Yours
- Choose Columns to add, hide, and reorder columns. The panel lists your current columns in order with arrows to move them, and everything else below under Add column: one column per custom and APR field, plus extra profile columns such as Immigration Status and Last Contact.
- Click any column header to sort, and click it again to reverse the order. Empty cells sort to the bottom either way.
- Your column choices are saved in your browser, so the table looks the way you left it next time.
Act on a Whole Group at Once
Check the box beside each student, or use the checkbox in the header row to select everyone who matches your current search and filters, including students on other pages, and a toolbar appears. These tools need permission to edit students, so read-only roles do not see the checkboxes.
- Set status for the group in the program year you are viewing (any status except Rejected).
- Assign advisor gives the group the same advisor. The dropdown lists your program's active advisors and admins.
- Add tag labels the group (more below).
- Log Event carries the group into Record an event, which logs a contact for every attendee in one step.
- Delete removes the group (admins only; see below).
Your selection survives a change of search or filter, so the count in the toolbar can include students you can no longer see. Choose Clear selection before you start a new group.
Tags Are Lightweight Groups
A tag is any label you invent: "Summer Bridge 2026", "Needs transcript", whatever helps you. Add one to a group from the toolbar, then pull that group back up any time: search for the tag, or add an Advanced filter condition on Tags, Contains. There is a Tags column in the column picker too.
Export and Delete
- Export downloads a CSV of your current view: every student matching your search and filters, not just the page on screen, with your chosen columns and Name first. Set the view up the way you want it, then choose Export. The button may spin for a moment while the remaining fields finish loading; the file always contains the complete set.
- Delete asks you to type DELETE to confirm, because it removes the students along with their contacts, documents, and history. It is not the end of the world, though: a recovery record is kept behind the scenes, so if something is removed by mistake, contact support at hello@triopilot.com to restore it.
- Export is an admin capability by default: an admin can grant Export Students to advisors and assistants in Settings → Team. Delete is different: deleting students is always admin-only and cannot be granted to any other role. See Add a user or advisor.