Manage your schedule
Publish the hours students can book, read your week at a glance, and block off the time you are not available.
When your program turns scheduling on, Schedule appears in your sidebar. One page holds three things, stacked: your week as a calendar, the hours you publish for booking, and the time you block off. If Schedule is not there, your program has scheduling switched off, and an admin turns it on in Settings, on the Features tab. While it is off, an old bookmark to the page sends you to your dashboard instead of showing you an empty one.
Publish the Hours You Can Be Booked
Find the Weekly Hours section and build your normal week.
- Choose Add Hours on a day. The first window opens at 9:00 AM to 5:00 PM, so adjust the two times to yours.
- Add a second window on the same day if you need one, and choose Remove on any window you do not want.
- Leave a day empty to take no appointments that day. It reads Not available.
- Copy Monday To Weekdays copies Monday's windows onto Monday through Friday. It leaves the weekend alone on purpose, so you never publish Saturday hours you did not ask for, and it stays greyed out until Monday has a window to copy.
- Choose Save Availability.
The line above the days tells you how much you are publishing in total, for example "6 hours 30 minutes published per week". If a window does not end after it starts, both of its boxes turn red and Save Availability stays greyed out until you fix it. A window that starts and ends at the same time counts as wrong for the same reason: it holds no time. A single day holds at most six windows.
A lunch break is a gap between two windows, not a separate setting. To keep noon to one o'clock free, give the day two windows: 9:00 AM to 12:00 PM, then 1:00 PM to 5:00 PM. Nothing is offered in between. This is also where a break you take every week belongs. Do not use Time Off for it, because that card is for one specific date, not for a repeating pattern.
What you save is what you get back. Two windows that overlap on the same day are merged into one, and the page redraws with exactly what was stored rather than what you typed.
Turn Booking On
The Available For Booking switch sits just below the calendar, at the top of the card that holds your hours. It starts off, so publishing hours alone does not open you up for booking.
- With it on, students are offered times inside your published windows, minus anything already booked.
- Turning it off stops new student bookings straight away. It does not cancel appointments you already have, and it does not erase your hours, so you can switch it back on later and pick up where you were. It does not stop a colleague, though: a staff member booking on a student's behalf can still place an appointment on you using the outside-hours option, whether or not you are open for booking. See Change or cancel an appointment.
- If you turn it on before you have added any hours, the page tells you so in an amber note. No hours means no times to offer.
Your published windows are the widest a student ever sees, not the final answer. Your program's booking rules trim them further: a student cannot book sooner than the minimum notice, which starts at a full day ahead, and cannot book further out than the booking window, which starts at a month. So hours you publish for tomorrow morning may be offered to nobody. If your week looks emptier to students than it does to you, that is usually why. An admin sets both, described in Set up appointment scheduling.
Choose the Formats You Meet In
Appointment Formats is where you say how you meet: in person, online, by phone, or however your program words it. The choices are your program's own contact modalities, the same list behind the Modality question on Log a contact, narrowed to the ones your admin allows for booking.
Select the ones you offer, or select none to take any format your program books. A student who picks a format you do not offer is simply not matched with you.
If there is nothing to choose from, the card says so in an amber note and points you at an admin. Usually that means your program has not set any contact modalities up yet. It can also mean the ones your admin picked for booking have since been renamed or removed, so a program that plainly has modalities still shows an empty card. Either way an admin fixes it in Settings.
Read Your Week
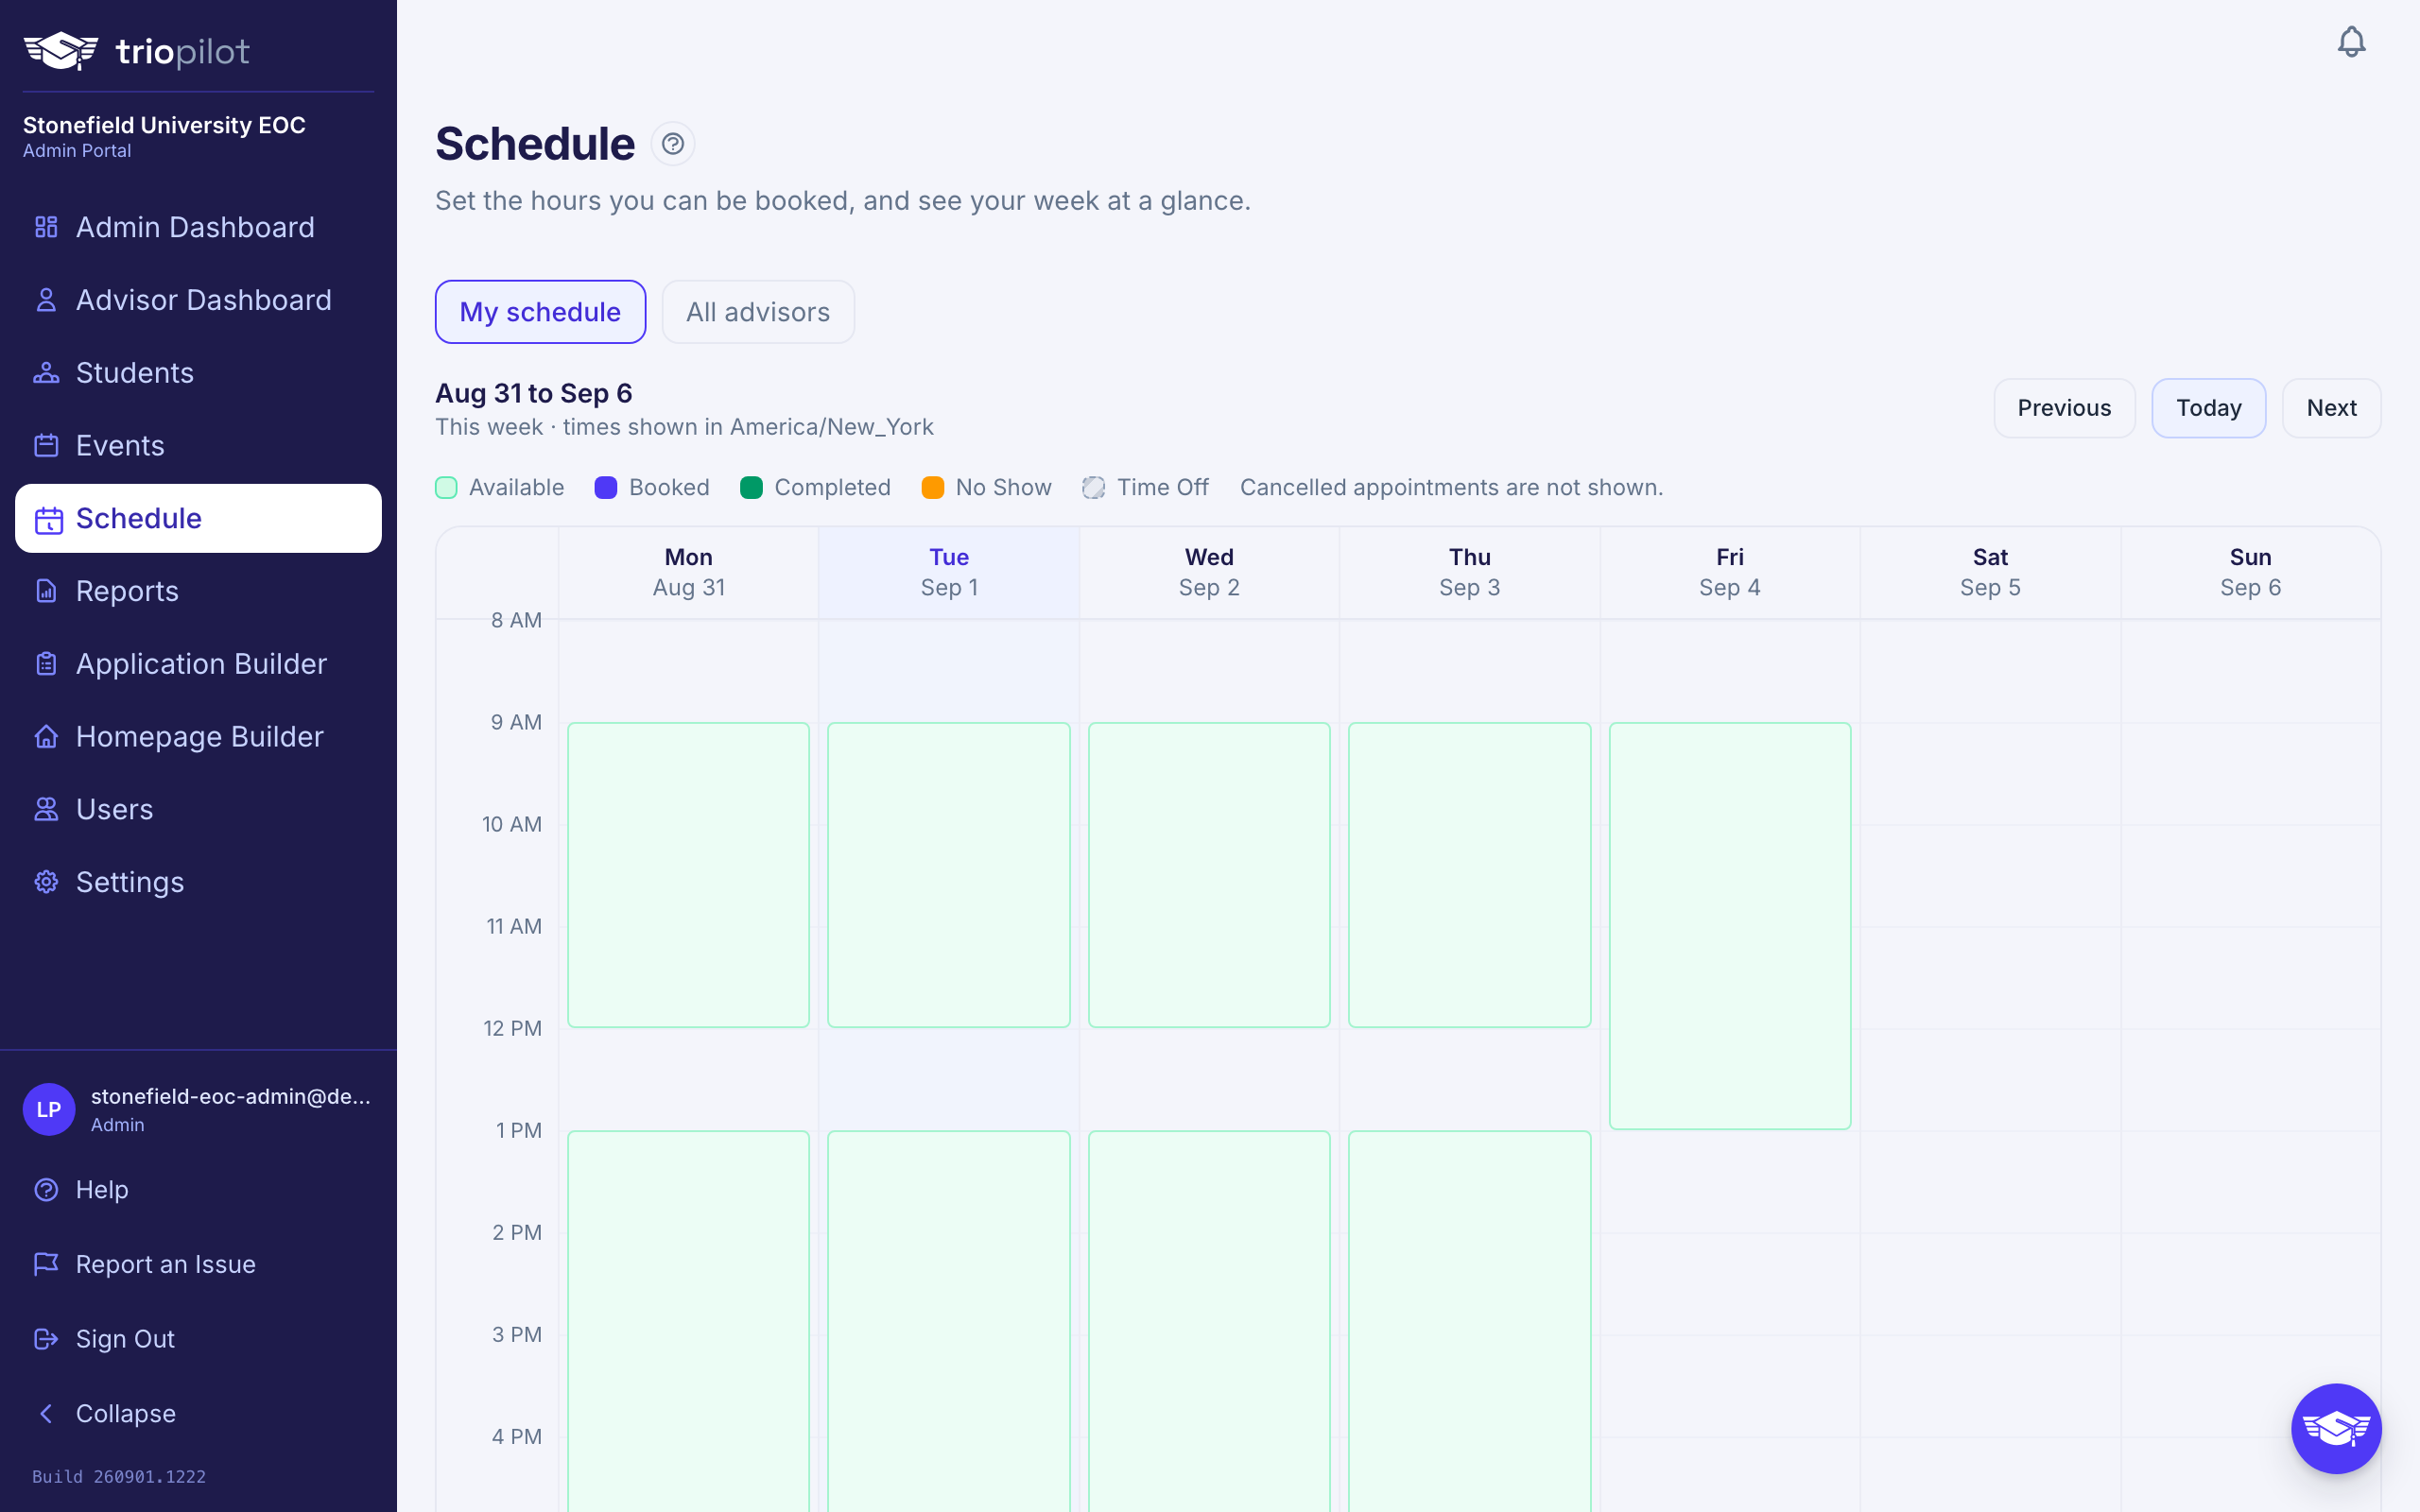
The calendar sits at the top of the page, because you look at your week far more often than you change your hours. Previous, Today and Next move between weeks, and the heading names the week and the timezone the times are shown in.
- A soft green wash is time you published. It is your posted availability, not a booking.
- A solid chip is an appointment, and its colour is the status: your program's main colour for Booked, green for Completed, amber for No Show. The legend above the grid names each one.
- Each chip shows the start time and the student's name. Select it to open their profile.
- A grey hatched band is time nobody can be booked in. It is deliberately textured rather than coloured, because nobody is being met then. In your own view every band is yours, and each one carries its label: the note you typed on a block, or Outlook for a meeting read from your connected Outlook calendar.
- A day tinted rose with a Closed label in its header is a program-wide day off: a holiday, or a closure an admin has set. Nobody can be booked then, whatever your posted hours say. Only admins change these, on the Days Off card in Settings under Features. If an appointment was booked before the day was closed, it stays on the calendar on top of the tint, so nothing quietly disappears.
- Cancelled appointments are not shown. That time is free again, so it should look free.
The grid always covers at least 8 AM to 6 PM, and stretches to fit any hours you published, appointments you have, or timed blocks that fall outside that. A whole-day block deliberately does not stretch it, which is why a week away does not squash the rest of your week into a sliver. On a phone the same week appears as a list of days instead of a grid, with the same information in the same order.
If you have connected your Outlook calendar, your Outlook meetings are drawn here too, as grey bands labelled Outlook, so one week view covers both calendars. They appear in your own week only, never in the whole program view, and the appointments TRIOPilot already put on your Outlook calendar are not drawn a second time. An amber note above the calendar means your Outlook calendar could not be read this time, so those meetings are missing from the picture, though booking still treats that time as busy. Connecting is optional. Where your installation offers it, the card to do it sits at the bottom of this page: see Connect your Outlook calendar.
Admins get one extra control here: My schedule and All advisors. The whole-program view shows every advisor's bookings and blocked time, names whose each one is, and hides the green availability shading, since published hours differ from one advisor to the next.
Block Off Time You Are Not Available
Use the Time Off card for a one-off absence: an external meeting, an appointment of your own, a week away.
- Tick All day for whole days, then set the first day and the last day. Or leave it clear and set a start date with a start time and an end date with an end time.
- Add a Note so you know later what the block was for, such as "Conference" or "Dentist". It is optional. Students never see it, but an admin looking at the whole program's week does, beside your name, so write it for a colleague to read.
- Choose Block This Time.
Four things are worth knowing before you use it:
- It stops new bookings, and nothing else. Students are not offered any time inside the block, and they never see the block or your note. The one exception is small: a student moving an existing appointment through their own link, at a time when every advisor happens to be blocked, is told that much and nothing more. Never whose block it is, and never what it was for.
- An appointment already inside the block is not cancelled. You were booked before the meeting came up, and quietly cancelling on a student who was never told would just mean they turn up anyway. Instead, the confirmation tells you how many appointments fall inside the block, so you can deal with them yourself. Now and then it says it could not check, and asks you to look at your calendar for those dates. Either way the block saves, and those appointments keep showing on the calendar, drawn on top of it.
- A block cannot be booked over. Even a staff member booking outside your posted hours cannot place an appointment inside one. To free the time, remove the block.
- A timed block with two different dates is one continuous stretch, not the same hours repeated on each day. Noon to one o'clock from Tuesday to Thursday blocks the whole of Wednesday too. The form warns you the moment the dates differ. To block the same hours on several separate days, add one block for each day. One block runs no longer than 366 days, which is a guard against a mistyped year rather than a limit you should meet.
Remove a Block You Did Not Mean to Add
Blocked Time Coming Up lists everything you have blocked that has not finished yet. Choose Remove beside it, confirm, and that time can be booked again inside your published hours.
Blocks that have already finished are not listed there, since they no longer affect anything. They still show on the calendar for the week they fell in. If you block a time that has already passed, the confirmation says so, so a row that never turns up in the list is not a save that failed.
Good to Know
- Your hours are the program's clock, not yours. Every time on this page is read on your program's clock, in the timezone named on the page, never on your own device's clock. If you are working from another timezone, type the hours you want students to see.
- Only advisors and admins take bookings. Assistants and read-only seats never carry a caseload, so students are never matched with them and they have no hours to publish. Schedule is still in their sidebar and the whole page still opens and fills in, so the refusal only arrives when they press Save Availability or Block This Time. Reading the calendar is the part of the page that is meant for them.
- A block is taken exactly as you set it. If your program keeps a gap between appointments, that gap is added around appointments, not around blocked time. If you want breathing room after a meeting elsewhere, draw the block wider.
- Changes here are recorded. Publishing hours and blocking time both land in the audit log, along with who made the change. Connecting and disconnecting an Outlook calendar are recorded there too. See See who changed what.